
Sharing and Permissions
These two features go hand-in-hand, so for the purpose of this guide, they will be conjoined.
Step 1: Open the Calendar menu on Teams from the left-hand side of Teams.
Step 2: Find the meeting that you would like to update. In this example, I am using a meeting named "Test" on a Monday.
Step 3: Left-click the meeting to open up the expanded view for the meeting
Step 4: Click the double-sided arrows icon to pull the details up from the meeting's history.
Step 5: From the Details tab (this should be the default location you will be sent to), select the recording by left-clicking it
Step 6: Click on the option "Watch in Browser" from the top-right to access Microsoft Stream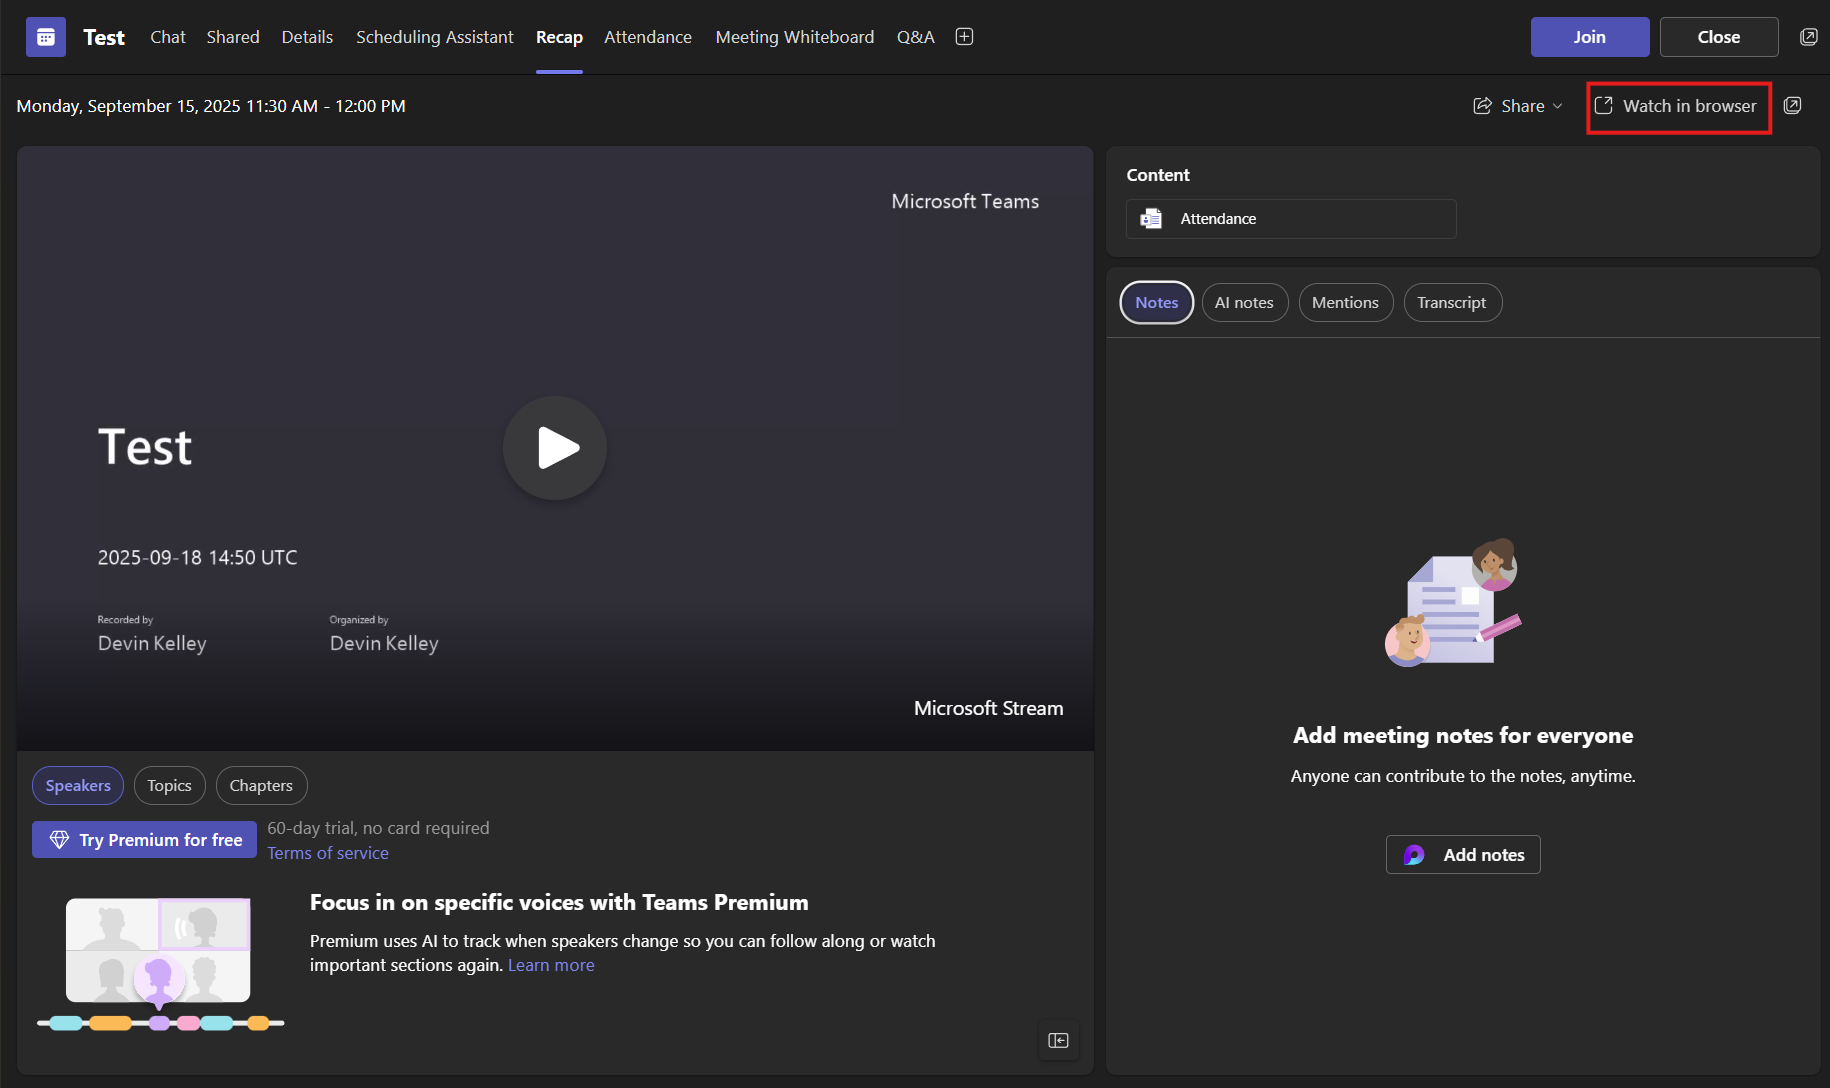
Step 7: From Microsoft Stream, click on the "Share" option to expand the drop-down for the meeting
Step 8: Click on "Share" from the expanded menu
Step 9: Click the symbol from the right-hand side of the recipient box to see the drop-down for the options
Step 10: Click on the option you would like to update for the permissions
Step 11: Press "Send", and the recording will successfully have been shared with the permissions you set!
Downloading a Recorded Meeting
Step 1: Open the meeting and select "Download"
After accessing the hyperlink you received, or following steps 1 through 6 mentioned above to open it manually, select "Download".
Step 2: Accept the prompt by selecting "Download"
Note: this message is a notification that ClipChamp features will not carry over since it is a video download only. If those are needed, share this link instead of downloading the video.
Step 3: Select the "Save As" option to open the Windows Explorer snap-in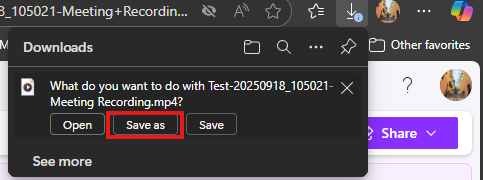
If you are signed in to One-Drive, that will be your default location to save the file to. Select any folder otherwise that you would prefer to save the file in.
Step 4: Click "Save" and you'll be all set with the file saved in your location of choice.
Comments
0 comments
Article is closed for comments.